Upgrading an older home with modern communication and security features does not require tearing open walls. This guide covers how retrofit intercom systems work, the different types available, what they cost, and how to choose the right solution for your property. Whether you want video entry, voice alerts, or smart home integration, a retrofit approach makes it simple to add these features without a major renovation.
A retrofit intercom system adds two-way audio and video communication to an existing home without running new wires through walls or ceilings. Most solutions use Wi-Fi, wireless radio signals, or existing low-voltage wiring already in place. This means you get modern intercom features in a matter of hours, at a lower cost than a full rewiring project.
This type of setup is built for homes that were not originally wired for an intercom. Instead of opening up drywall to run new cable, these systems work through your home’s Wi-Fi network, wireless radio signals, or wiring that already exists in the walls.
This makes a home retrofit intercom system a smart choice for older houses, condos, and any property where cutting into walls is not practical or allowed.
This approach solves a real problem for homeowners. You want better communication and entry security, but you do not want the mess and expense of tearing open walls.
Main benefits include:
Choosing the right retrofit home intercom system depends on your home’s layout and existing wiring. Here is a side-by-side comparison.
Pricing depends on the number of stations, video capability, and whether you hire a professional or install it yourself. A basic two-station wireless kit starts around $150. Larger systems with video and smart home features can run $400 to $800 fully installed.
Professional installation usually adds another $100 to $300, though many kits are made for straightforward do-it-yourself setup.
Key Takeaway: You do not need to rewire your home to enjoy modern intercom features. A retrofit intercom system uses your existing Wi-Fi or wiring, saving you both time and money while adding real security value.
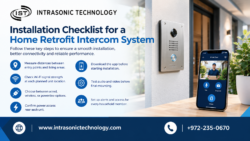
Skipping the Wi-Fi signal test is one of the most frequent issues, since a weak connection can cause lag or dropped calls. Placing an outdoor unit too far from a power source is another common mistake, so plan ahead for battery backup or a nearby outlet.
Retrofitting an intercom system is one of the simplest upgrades you can make to an existing home. Whether you choose a Wi-Fi video system, a wireless option, or one that reuses existing wiring, the process is faster and more affordable than most homeowners expect. Trusted manufacturers like Intrasonic Technology offer retrofit-friendly systems built specifically for homes without existing intercom wiring, making the upgrade even easier.
If you are ready to add secure, reliable communication to your home, reach out to a trusted installer to compare options and schedule a consultation today.
Q1. Can I install a retrofit intercom system myself?
Ans. Yes. Most Wi-Fi and wireless kits are built for do-it-yourself setup with simple app-guided instructions.
Q2. Will a retrofit intercom solution work in an older home?
Ans. Yes. Many systems are made specifically for homes without existing intercom wiring.
Q3. Does an intercom system retrofit require internet access?
Ans. Wi-Fi models need a stable internet connection. Wireless RF and powerline systems can run without the internet, though they may offer fewer app features.
Q4. How long does a typical retrofit installation take?
Ans. Most homeowners finish installation in two to four hours, depending on how many units they install.
Q5. Can a retrofit intercom system connect with smart home devices?
Ans. Many models work with Alexa, Google Home, and similar platforms for voice control and notifications.

Hours: 8am – 5pm Monday – Friday
Phone: 877-435-0670
International: 972-235-0670
Fax: 972-235-0890
9525 Forest View Street
Dallas, TX 75243
The Number 1 Top Manufacturer of RETRO Replacement Home Intercom Systems, Speakers, Front Door Security Cameras and Audio Equipment
©2011-2023 Intrasonic Technology, All Rights Reserved
Website Design & Development by Blue Cardigan Creative